
Read and follow all warnings
and instructions in this manual
to avoid personal injury or
property damage.
Table of Contents
- 1.WHAT MAKES IT DIFFERENT3
- 2.IMPORTANT SAFEGUARDS4
- 3.PARTS LIST6
- 4.ASSEMBLY INSTRUCTIONS7
- 5.GAS LEAK TEST13
- 6.OPERATING INSTRUCTIONS14
- 7.PROPER CARE AND MAINTENANCE16
- 8.BURNER INSPECTION16
- 9.SPECIFICATIONS17
- 10.FREQUENTLY ASKED QUESTIONS18
- 11.LIMITED WARRANTY20
Jacksonville, Arkansas, USA
info@hurricanebayfishfryer.com
hurricanebayfishfryer.com
What Makes It Different
Every part of the HB-4 solves a problem the cheap fryers don’t.
★ Two-Stage V-Drain
The pot bottom slants toward the drain. The drain spout itself pitches downward away from the pot. The last drop runs out on its own and pulls every burned crumb with it. No tipping the pot. No tilting the unit. Most fryers drain through a side valve that sits an inch above the pot bottom, trapping used oil and sediment after every “clean.”
★ Drip-Back Basket Bar
An angled steel bar holds the basket up and forward over the pot. Oil drips back into the pot. The basket never sags into the grease and never drips on your concrete. Most fryers hang the basket off the back lip where it drips outside the pot and sags into the oil over time.
★ Sealing Lid Notches
Cutouts in the lid are sized to the basket handles. The lid closes flush with both baskets in place. Heat stays in. Bugs and ash stay out. Most lids leave fist-sized gaps when baskets are hung.
★ Lock-In V-Pocket Chassis
The pot drops into a V-shaped pocket and seats by gravity. Two self-aligning bolts are in the hardware kit if a permanent setup is preferred. Most lift-off fryers need bolts to be secure at all; the HB-4 is stable without them.
★ Full-Circle Propane Seat
The 20 lb tank drops into a full-circle holder on the chassis and locks by geometry. Designated bungee slots run through the chassis loops for transit. Most fryers stage the tank on a flat shelf with a strap that loosens.
★ Twin Prep Tables
A steel prep table on each side of the burner. Raw on one side, cooked on the other — work flows in one direction. Most fryers in this size class give you one shelf at best; most direct competitors give you nothing.
Twelve-gauge American steel · 90,000 BTU · Built in Jacksonville, Arkansas
Important Safeguards
We want you to assemble and use your "Hurricane Bay" as safely as possible.
Please read and follow all safety warnings and instructions carefully before assembling and operating your cooker.
- CAUTION!!! HOT OIL AND WATER DO NOT MIX. Always thoroughly dry the inside of the fryer prior to adding oil. Never place frozen or wet food in the cooker. Always make sure food is fully thawed and excess moisture is removed before use. Doing this will cause the oil to erupt violently and may lead to personal injury or property damage.
- Always use caution when lighting the cooker. Crack open the regulator valve and ignite through the front burner port with a long-stem trigger lighter. Do not allow gas to build up. If the cooker does not ignite within 3 seconds, close the regulator valve and wait 1 minute before attempting to light the cooker again. Never place your body in front of or near the burner port.
- Always use caution when placing food in the cooker. Never drop food into the cooker. Doing this may cause the oil to splash and may lead to personal injury or property damage.
- Only use this cooker on a hard, level, noncombustible, stable surface (concrete, ground, etc.) capable of supporting the weight of the cooker.
- Proper clearance of 10 feet between the cooker and combustible material (bushes, trees, wooden decks, fences, buildings, etc.) or structures should be maintained at all times when the cooker is in use.
- Do not use this cooker for other than its intended purpose.
- For outdoor use only. Do not operate the cooker indoors or in an enclosed area. In windy weather, place the cooker in an outdoor area that is protected from the wind, with the cooker facing the wind.
- When opening the lid, make sure it is pushed all the way back so it rests against the basket hanger. If the lid is not resting against the bracket, it could fall back to a closed position and cause bodily injury.
- Never cook with the lid down. However, the lid may get very hot during use. Use caution when opening the cooker lid. Always wear oven mitts or gloves to protect your hands from burns. Avoid touching hot surfaces.
- Place the cooker in an area where children and pets cannot come into contact with the unit. Close supervision is necessary when the cooker is in use. Do not leave the cooker unattended when in use. Oil will remain hot for as long as 3 hours; use caution until oil has cooled down.
- Never move the cooker when it is in use or when it contains hot oil.
- Do not use the cooker near gasoline or other flammable liquids, gases, or where flammable vapors may be present.
- Use caution when assembling and operating your cooker to avoid scrapes or cuts from sharp edges of metal parts.
- After each use, clean and dry the cooker thoroughly and reapply a light coat of nonstick cooking oil to the interior to prevent rusting, as explained in the "Proper Care and Maintenance" section of this manual. Cover the cooker to protect it from the weather.
- Use caution when lifting or moving the cooker to prevent strains and back injuries. Moving the cooker may require the help of an additional person. The pot lifts off the chassis for tabletop mode. Only lift when the pot is fully cool and fully empty.
- We advise that a fire extinguisher be on hand. Refer to your local authority to determine proper size and type of fire extinguisher.
- Accessory attachments not manufactured by Hurricane Bay for these products are not recommended and may lead to personal injury or property damage.
- Store the cooker out of reach of children and in a safe location when not in use.
- Do not attempt to service the cooker other than normal maintenance as explained in the "Proper Care and Maintenance" section of this manual. Major repairs can be authorized by Hurricane Bay only.
- Caution! Make sure to secure the propane tank to the chassis with the bungee cord through the slots provided on the tank shelf.
- Properly dispose of all packaging material.
- Use caution when transporting the cooker, especially in a vehicle. Make sure you tie down the cooker securely so it will not move.
Use caution and common sense when operating your cooker.
Failure to adhere to safety warnings and guidelines in this manual could result in bodily injury or property damage.
Save this manual for future reference.
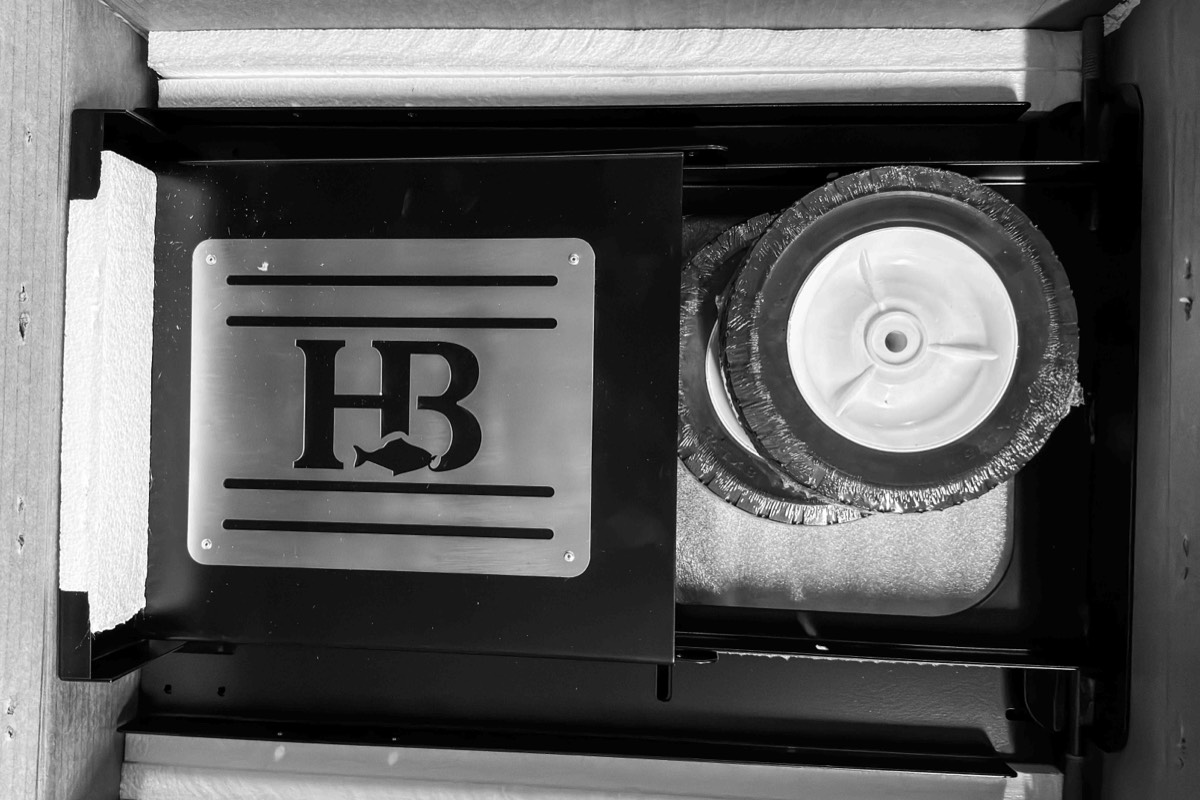
Parts List
The Hurricane Bay HB-4 ships as a kit. The pot and chassis base are welded units; the panels, shelves, wheels, and gas components bolt on during assembly. The regulator kit, drain valve, temperature gauge, thread tape, and both baskets ship inside the fryer pot. Confirm every part below is present before beginning assembly.
Included In The Box
| # | Part | Qty | Description |
|---|---|---|---|
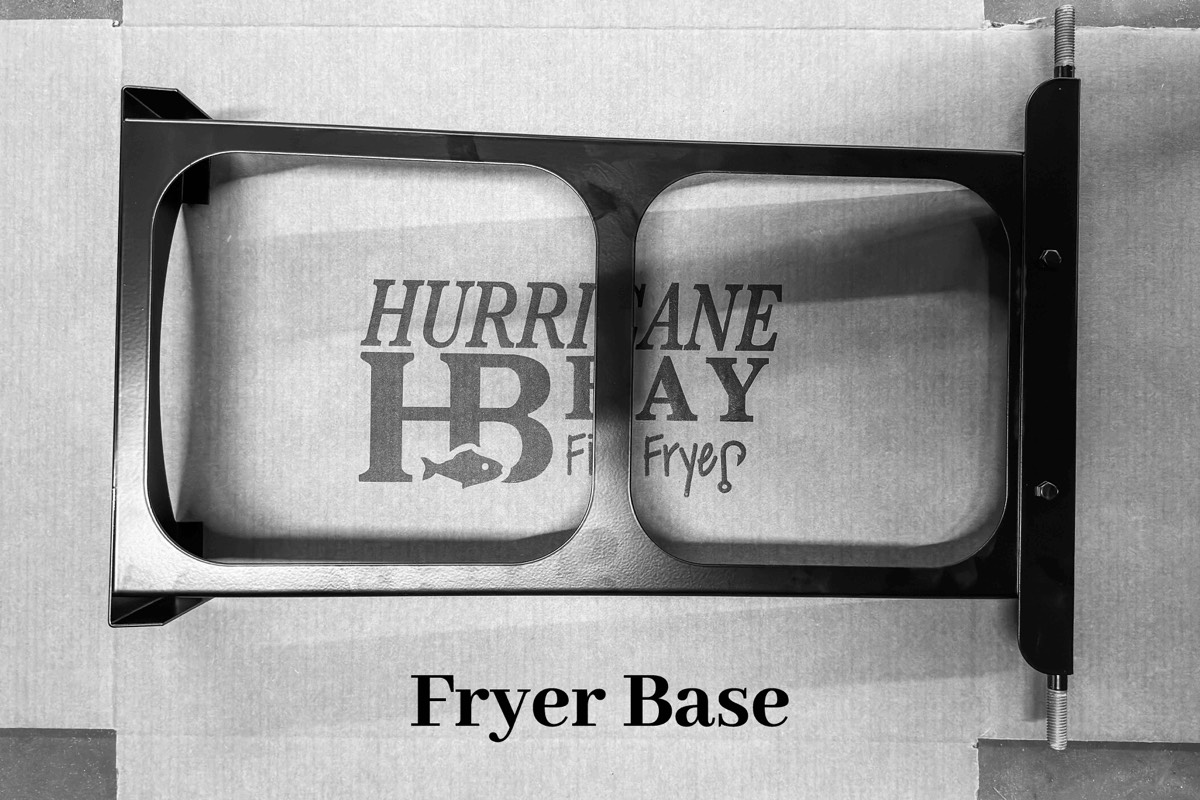
| 1 | Fryer Chassis Base | 1 | Welded steel frame. Propane seat, axle stubs, V-frame pocket. |
| 2 | Pot & Lid | 1 | 12-gauge steel. Welded V-drain, basket hanger, ports, and handles. |
| 3 | Wheel | 2 | Sealed-bearing. One 1/2" nylock nut each. |
| 4 | Propane Bottle Pad | 1 | Bolts to the base between the wheels. |
| 5 | V-Panel | 2 | Front and back panels. Universal — either fits either side. |
| 6 | Dog-Bone Cross Brace | 2 | Bolt to each outer side. Squares the frame. |
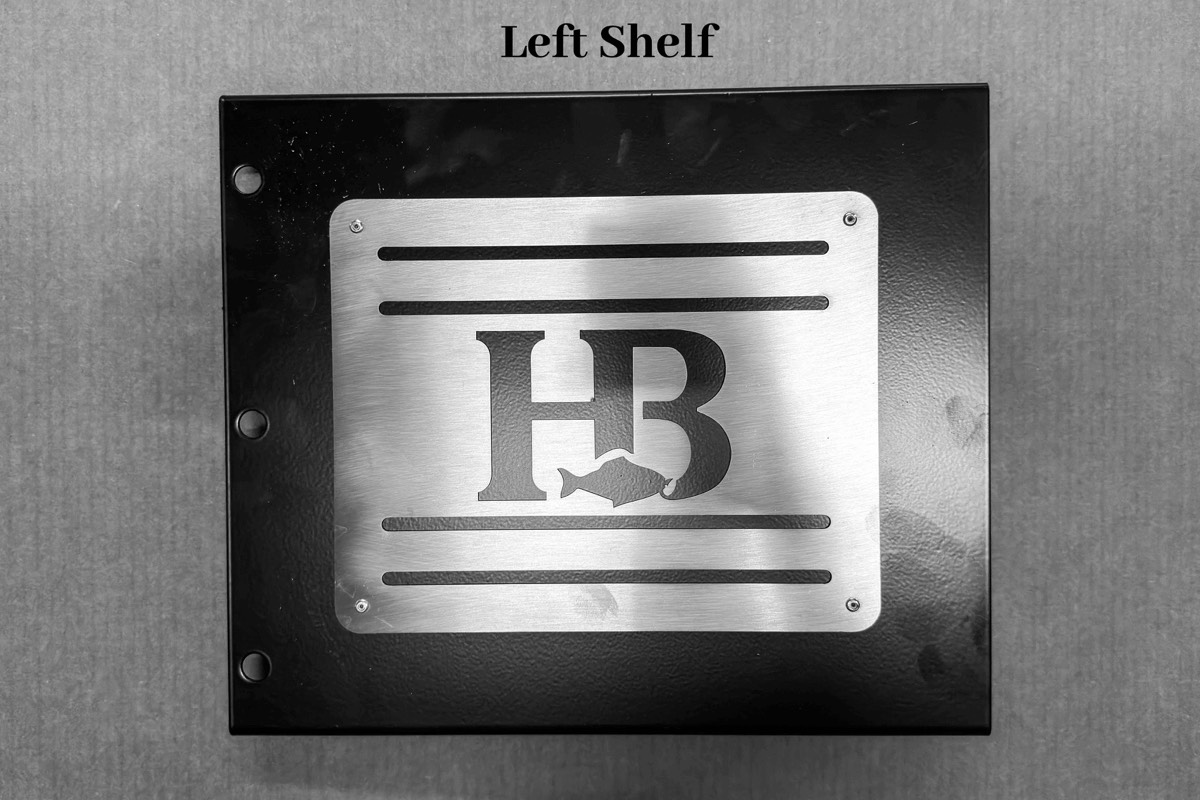
| 7 | Side Shelf | 2 | Left = HB logo, right = slatted. |
| 8 | Orifice Plate | 1 | Takes the brass orifice, bolts to the burner intake. |
| 9 | Gas Regulator Kit | 1 | 20 PSI regulator, 48" hose, QCC-1 fitting, brass orifice. Inside pot. |
| 10 | Drain Valve | 1 | Threads into rear drain port. Inside pot. |
| 11 | Temperature Gauge | 1 | Dial, °F/°C. Threads into front port. Inside pot. |
| 12 | Thread Tape | 1 | Seals the drain and gauge threads. |
| 13 | Frying Basket | 2 | Stainless mesh, fixed handle. |
| 14 | Bungee Strap | 1 | Secures the propane tank to the chassis. |
| 15 | Hardware Kit | 1 | 26× 1/4-20×1/2" bolts + nuts. 2× 1/2" nylock. 2× 1¼" bolts + 2 spacers (optional). |
| 16 | Owner's Manual | 1 | This document. |
Required, Not Included
- 20 lb LP propane cylinder with current OPD valve.
- Cooking oil. Approximately 4 gallons — fill about 3/4 up the basket, never over the top. Peanut, canola, or any high-smoke-point frying oil rated to at least 400°F.
- Class K (or BC) fire extinguisher. Required.
- Heat-resistant gloves and a long-sleeve cooking apron.
- Metal grease-disposal container for the V-drain catch.
- Long-stem trigger lighter or BBQ match for ignition.
If any included part is missing or damaged, stop and contact Hurricane Bay before assembling further. Do not modify, do not improvise, do not source replacement hardware locally before checking with the factory.
Assembly Instructions
Leave all hardware finger-tight until the chassis is fully built, then go back and snug everything down. Tightening as you go locks the frame before the holes line up.
Tools You Will Need
- #3 Phillips-head screwdriver
- 7/16" wrench or socket
- Pliers
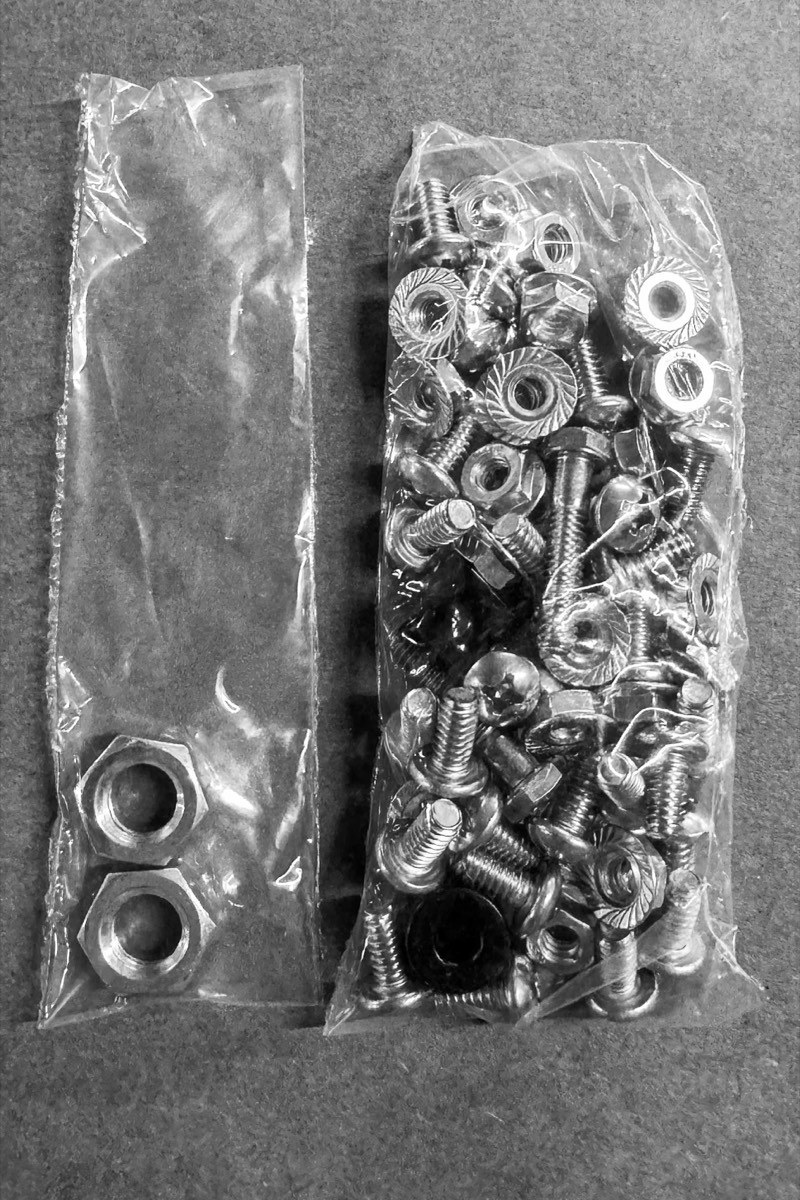
Hardware In The Box
- 26 × 1/4-20 × 1/2" bolts and nuts
- 2 × 1/2" nylock nuts (wheels)
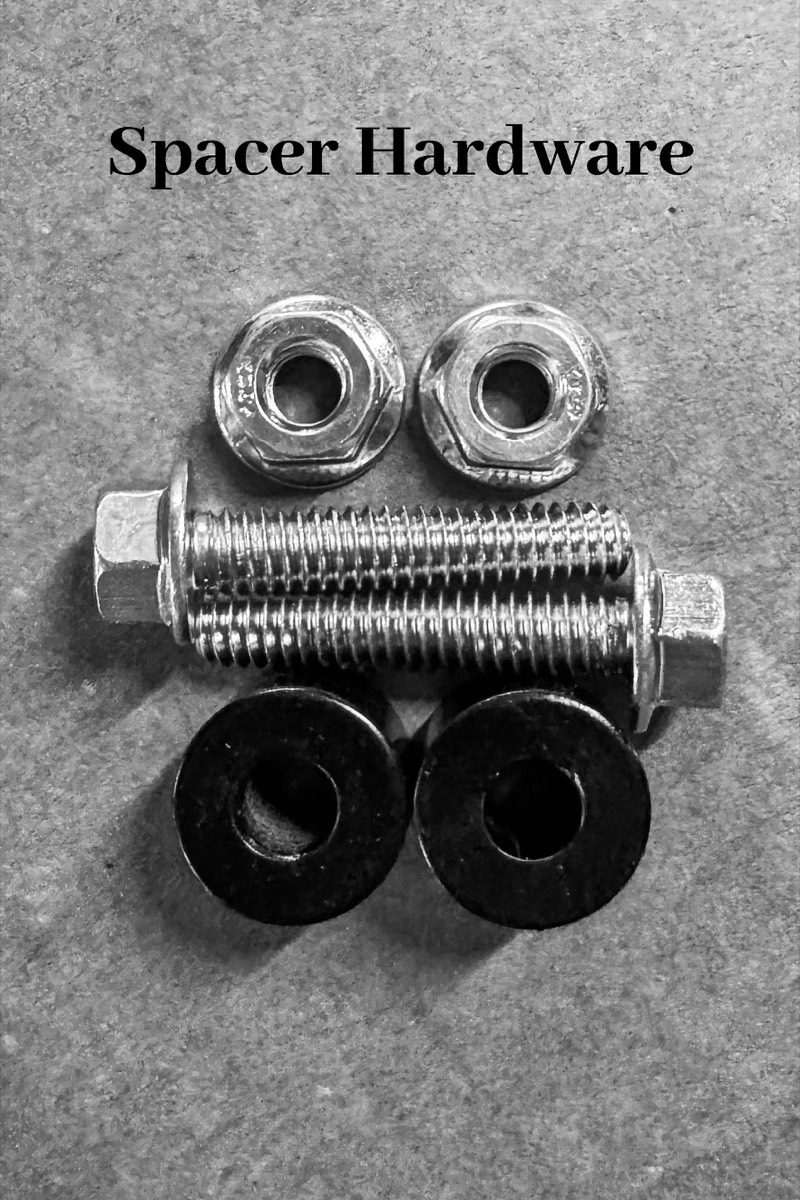
- 2 × 1/4-20 × 1¼" bolts + 2 spacers (optional pot lock)
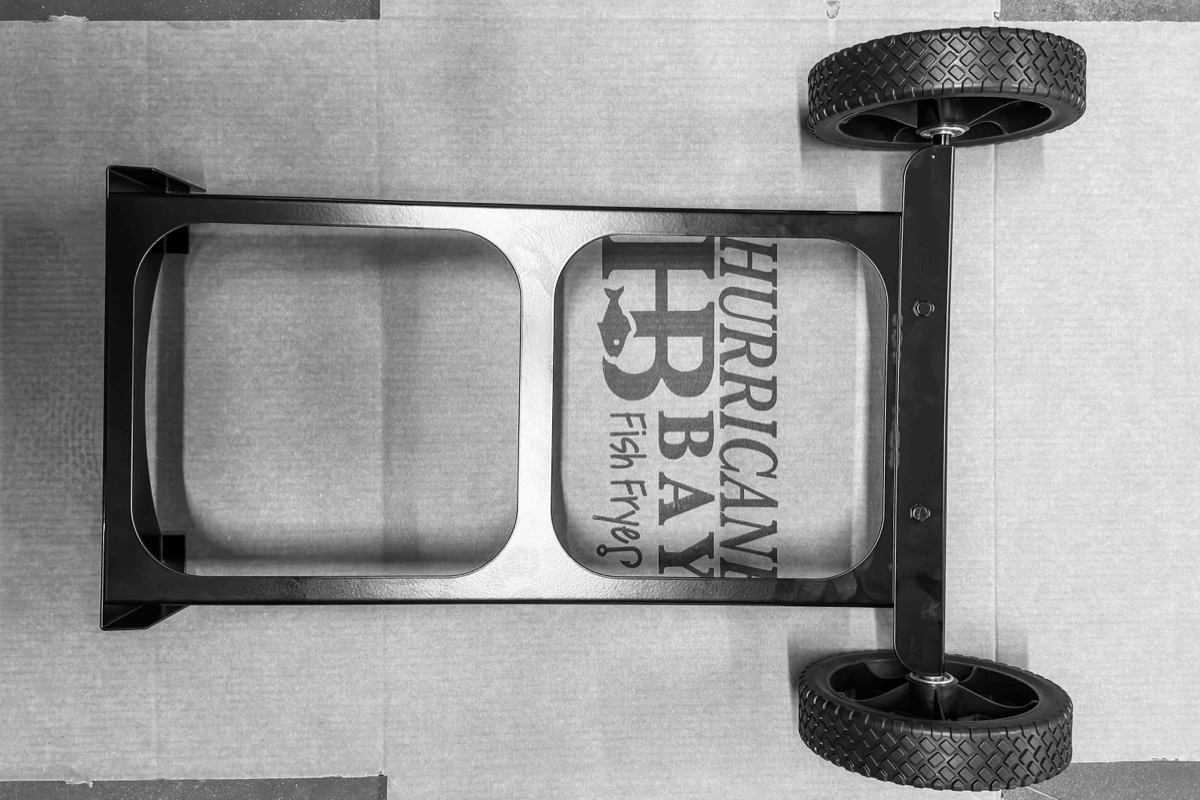
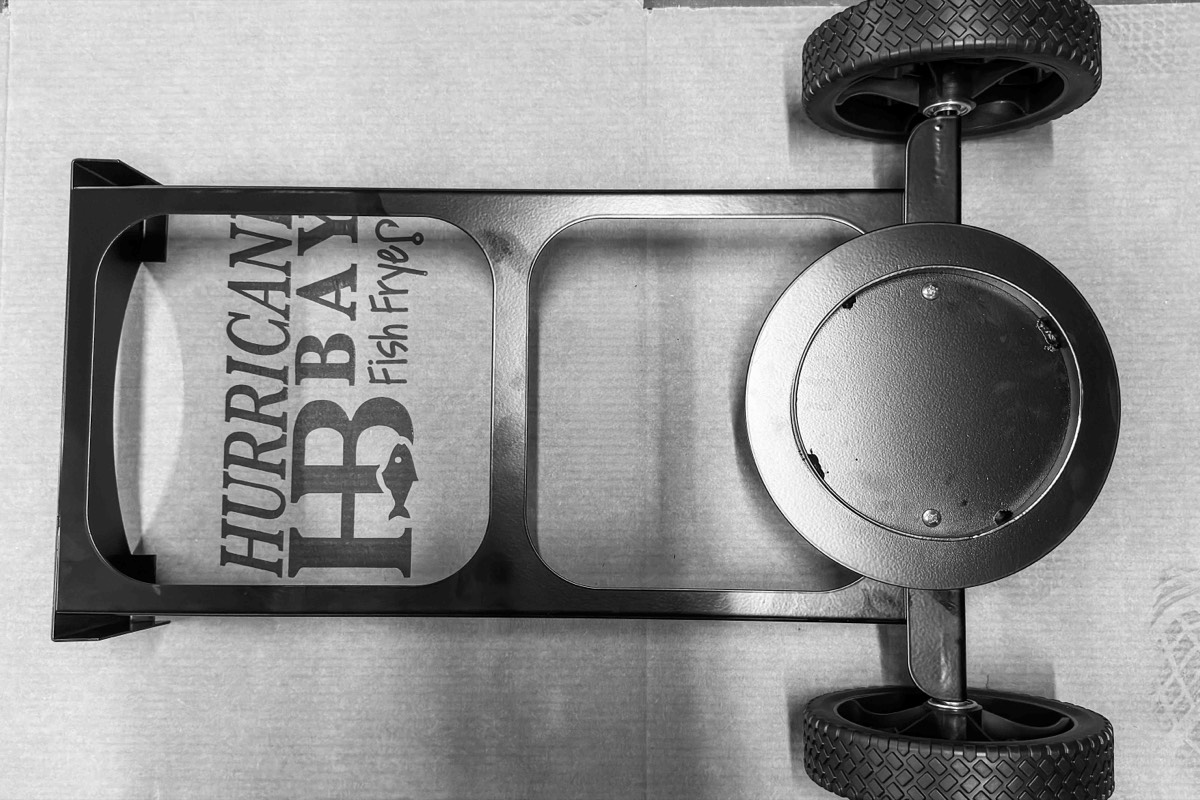
Parts laid out: fryer chassis base, 2 wheels, propane bottle pad, 2 universal V-panels, 2 dog-bone cross braces, left shelf (HB logo), right shelf (slats), fryer pot, orifice plate. The regulator kit, drain valve, temperature gauge, thread tape, and both baskets ship inside the pot.
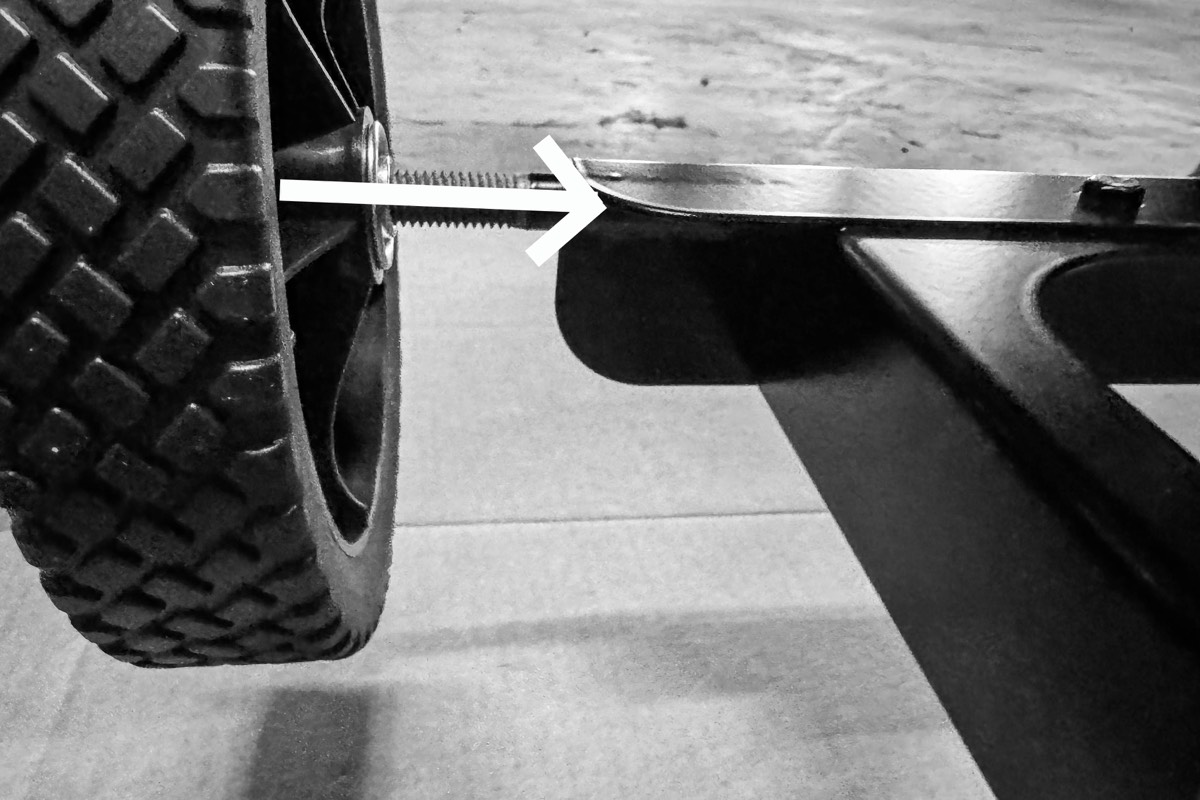
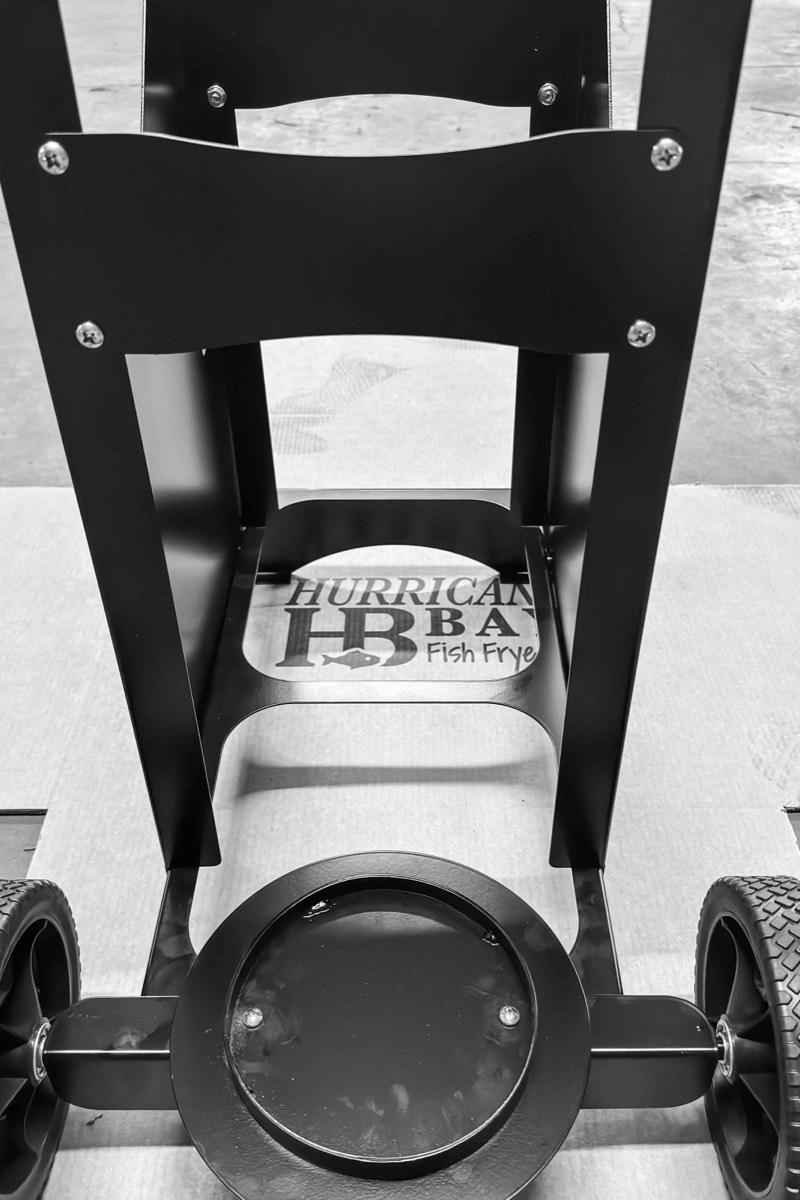
Step 1 · Wheels — 2 nylock nuts
Set the chassis base on the ground. Slide a wheel onto each rear axle stub, thread on a 1/2" nylock nut, and tighten until snug. Spin each wheel to confirm it turns freely.

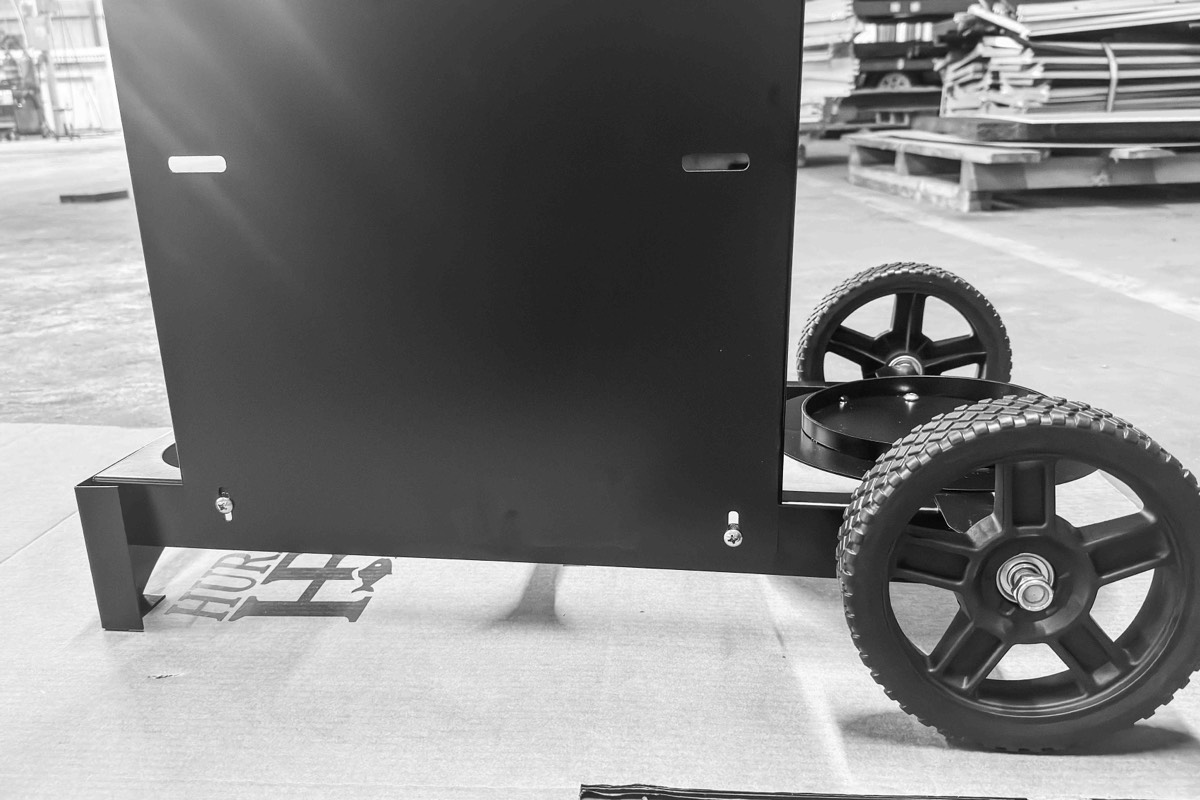
Step 2 · Propane Bottle Pad — 2 bolts, 2 nuts
Set the propane pad onto the base, centered between the two wheels. Fasten it with two 1/4" bolts down through the pad and two 1/4" nuts underneath.

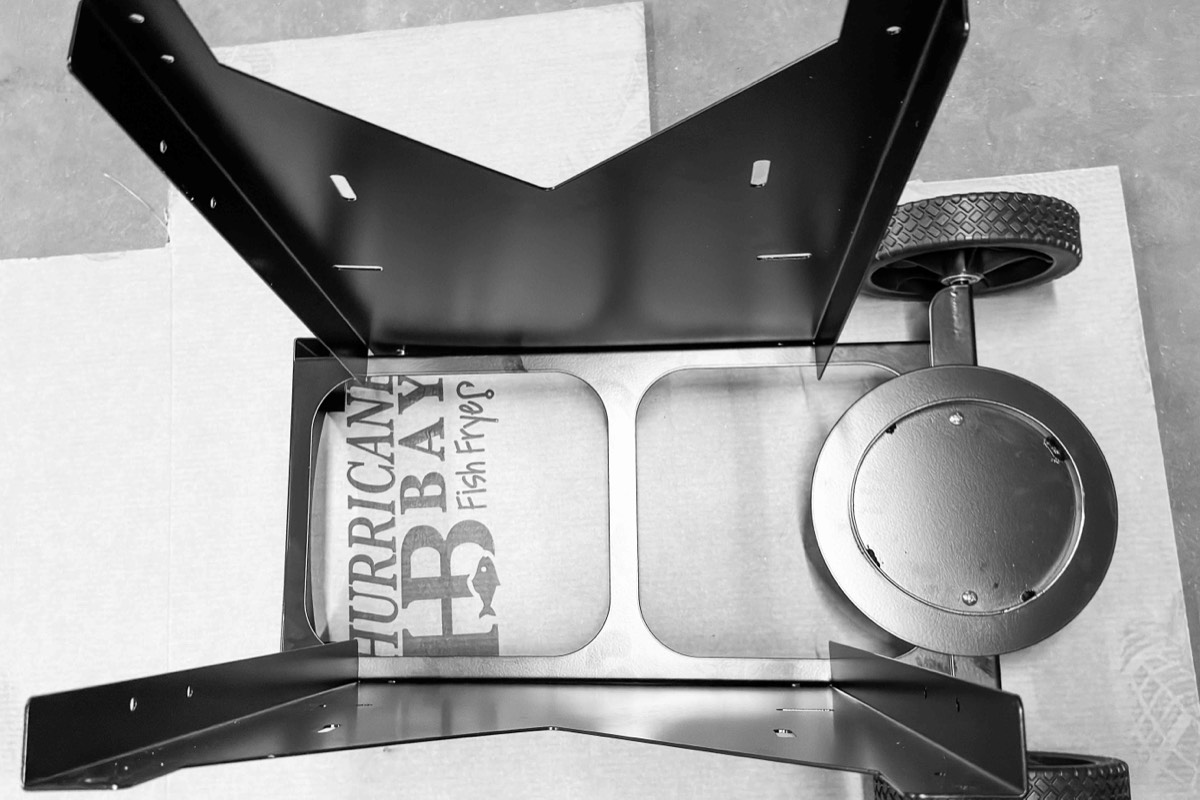
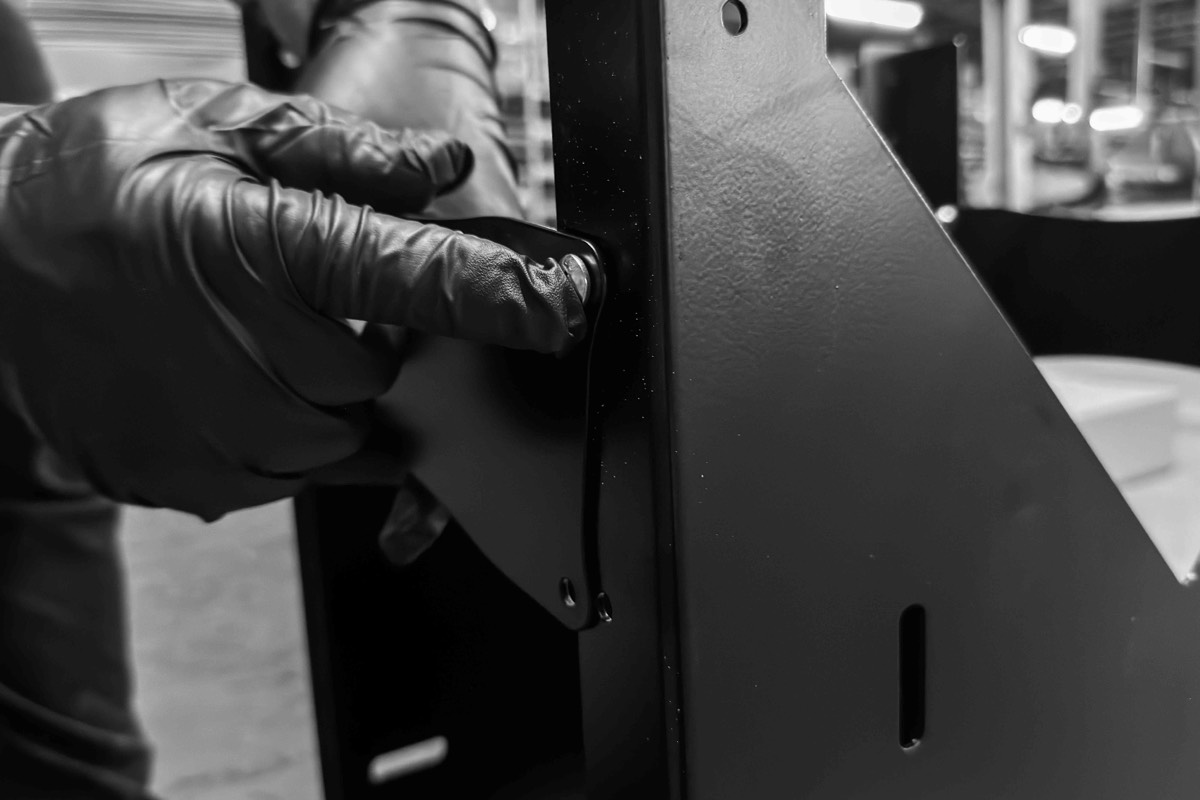
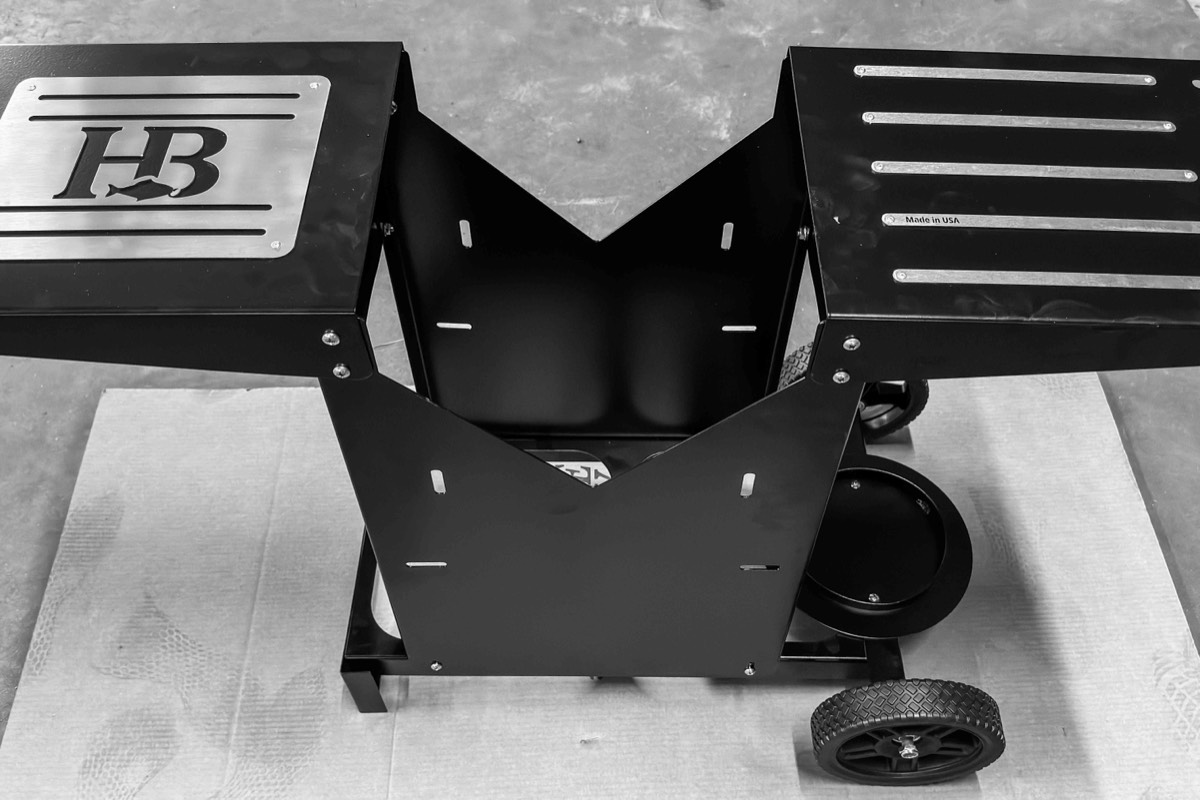
Step 3 · V-Panels — 2 bolts, 2 nuts per side
Attach the front and back V-panels to the chassis base using two 1/4" bolts and nuts per side. The panels are universal, so either panel goes on either side — there is no left or right to sort out.

Step 4 · Dog-Bone Cross Braces — 4 bolts, 4 nuts per side
Attach a dog-bone cross brace to the outside of each side of the chassis, four 1/4" bolts and nuts per side. These square the frame up, so leave them slightly loose until both are on, then tighten.

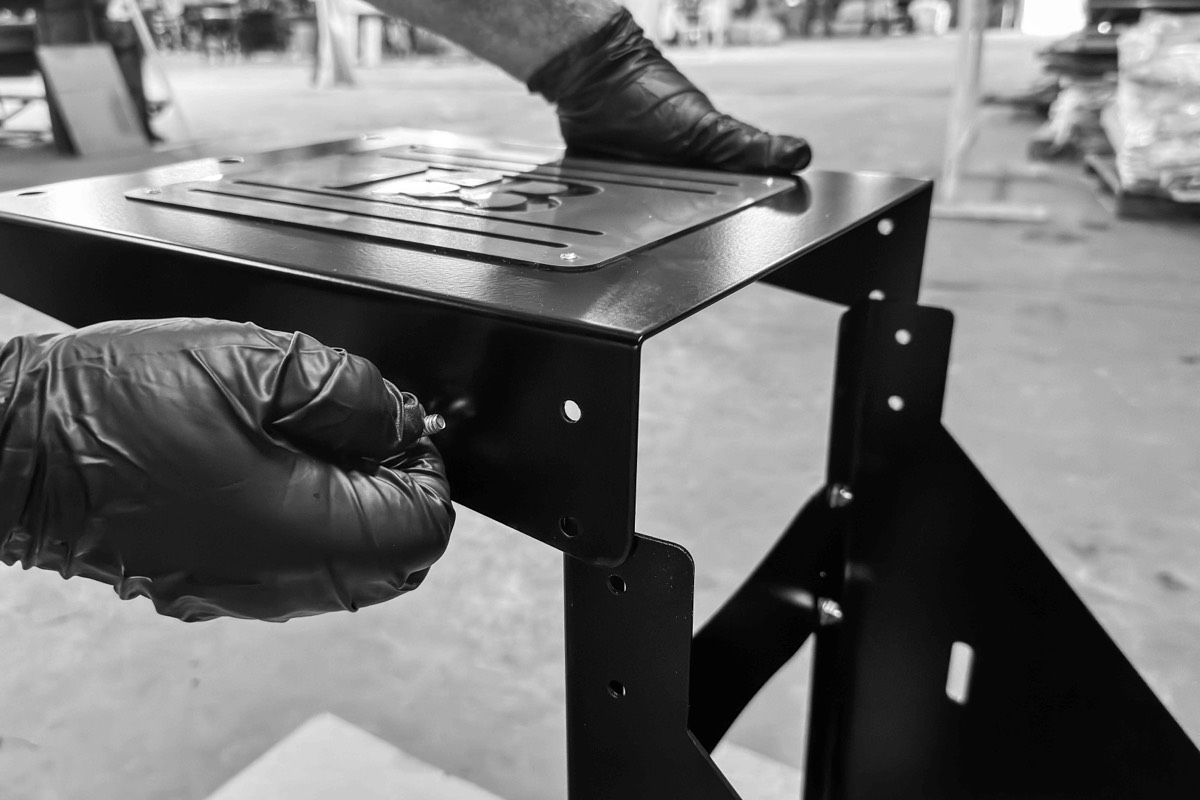
Step 5 · Side Shelves — 4 bolts, 4 nuts per shelf
Attach the shelves using two 1/4" bolts and nuts on each side of each shelf (four per shelf). The HB-logo shelf goes on the left; the slatted shelf goes on the right.

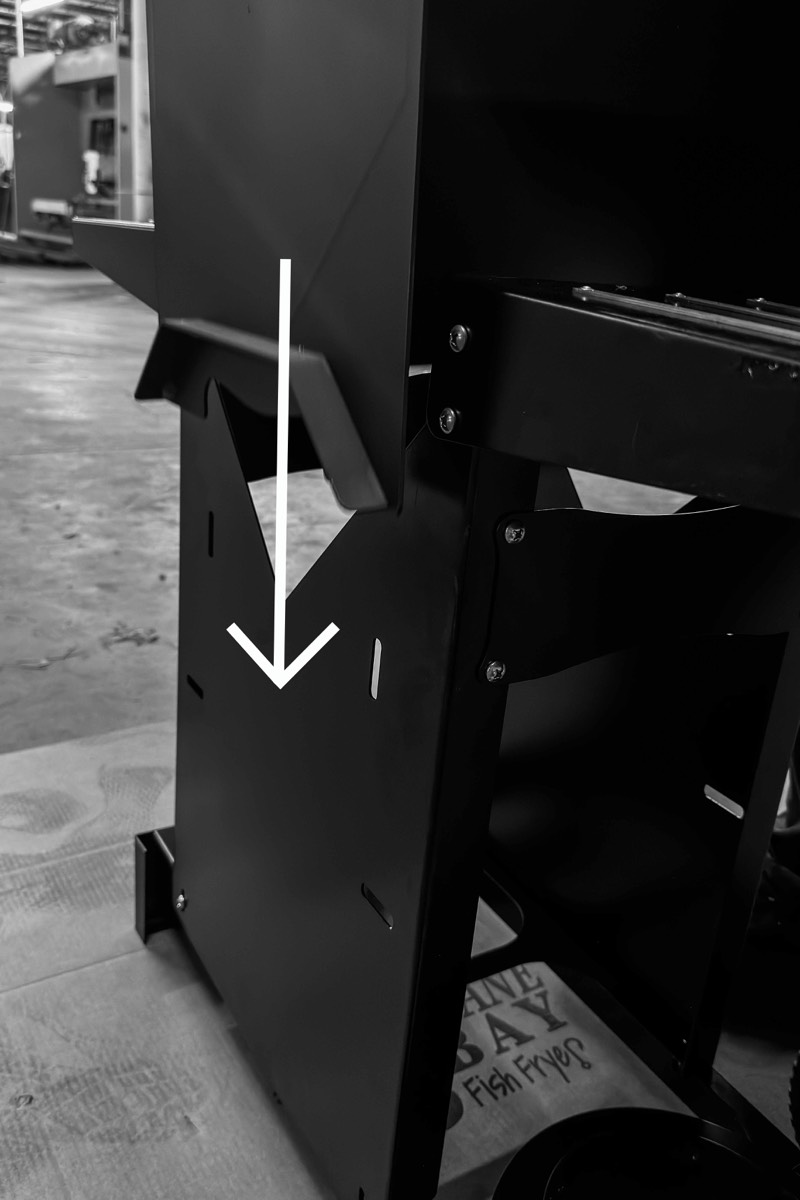
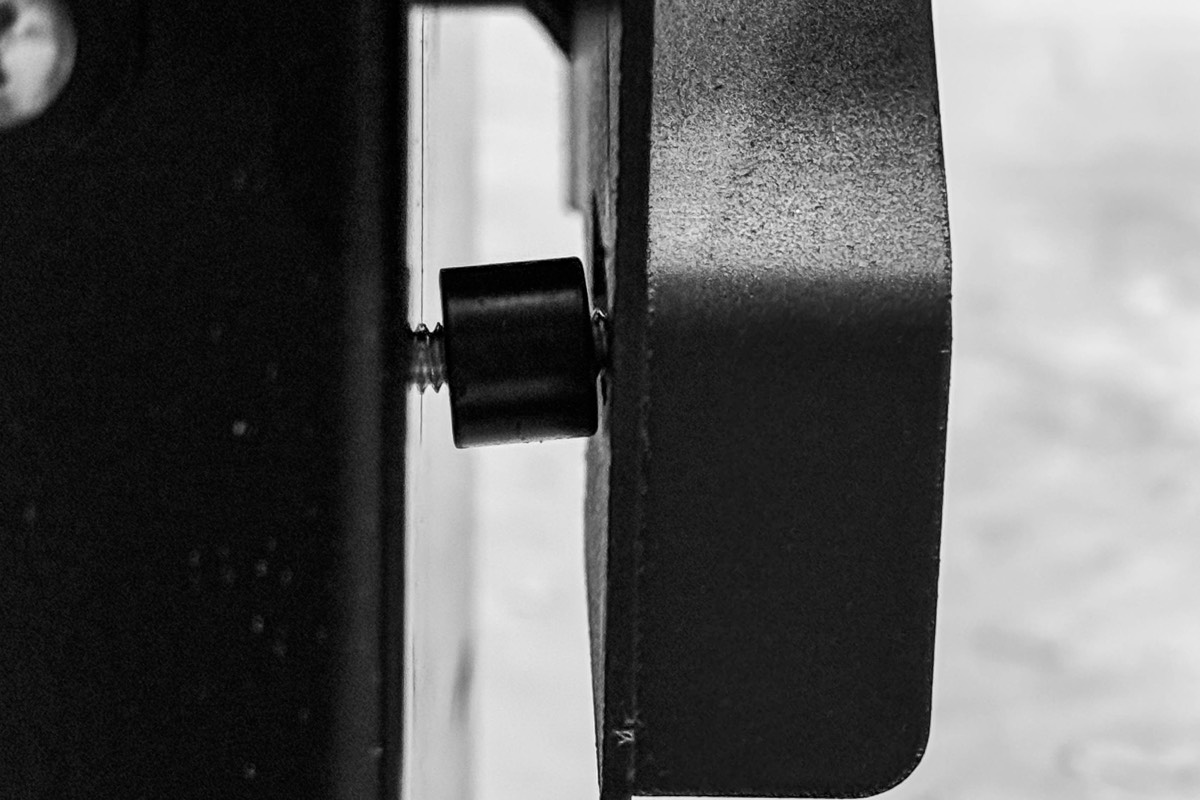
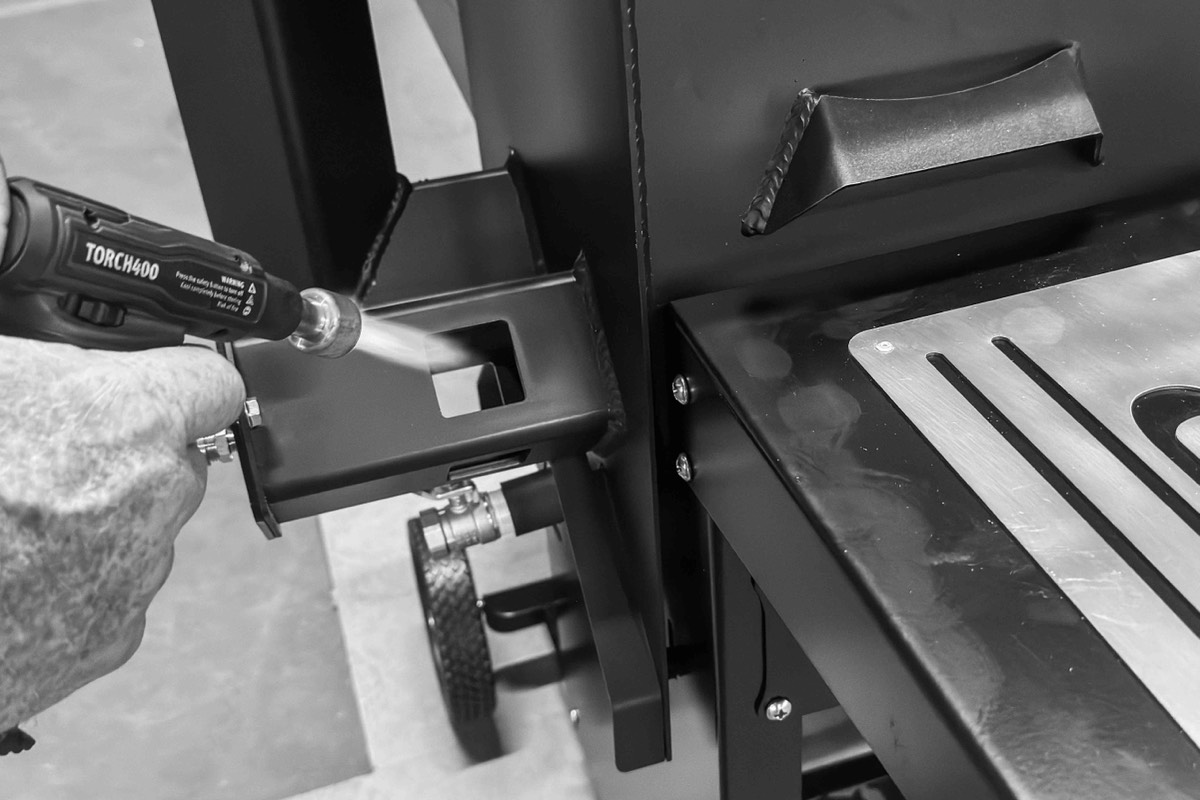
Step 6 · Seat The Fryer Pot — optional: 2 bolts, 2 spacers, 2 nuts
Lower the fryer pot into the V-frame of the chassis. It seats by gravity and is stable as-is. Optional permanent lock: use the two 1/4" × 1¼" bolts, one spacer on each, run along the back side under the chimney to the left and right of the drain, and secure with the two nuts.
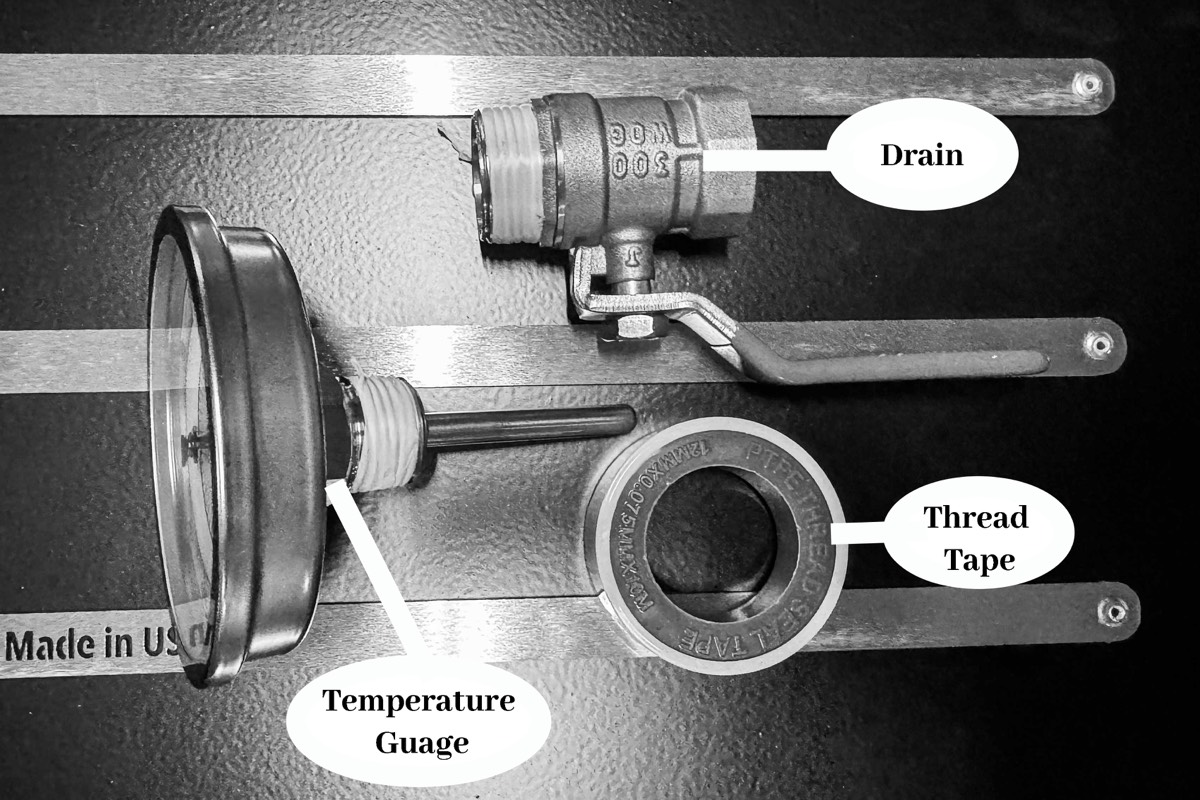
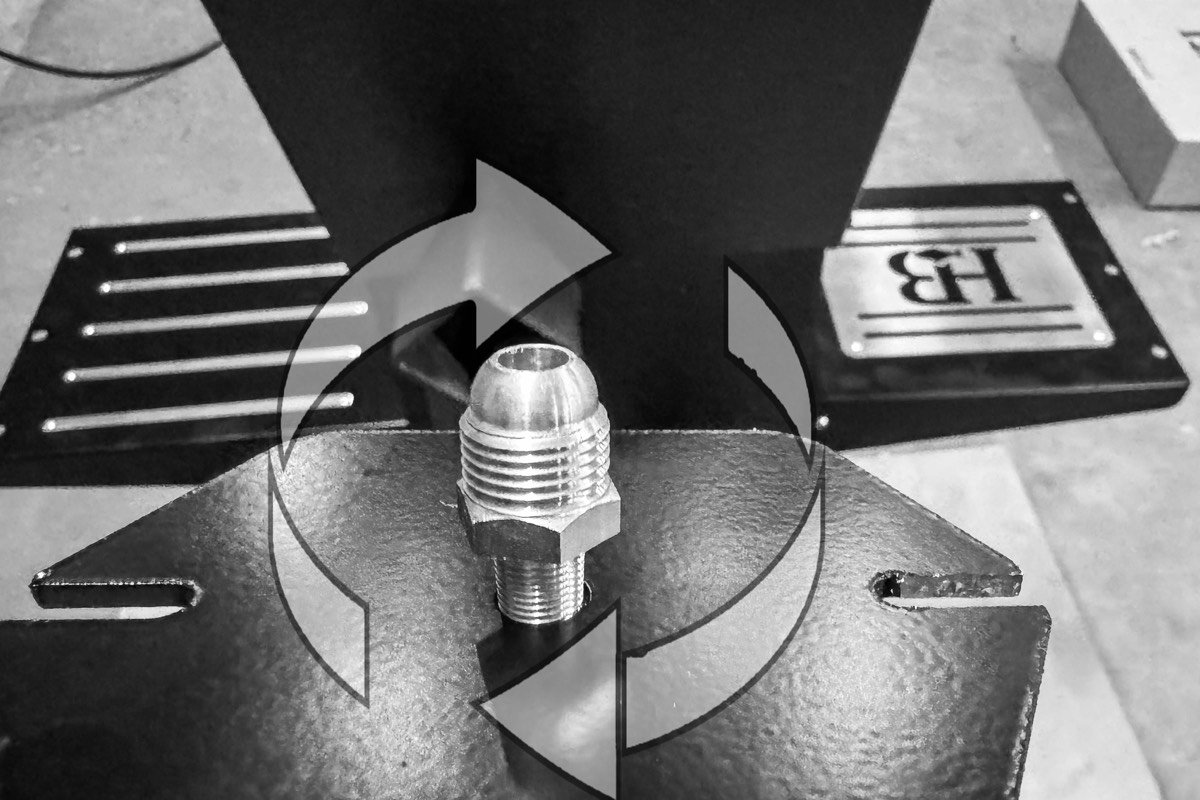
Step 7 · Drain Valve & Temperature Gauge
Take the drain valve and temperature gauge out of the pot and wrap the threads of both with thread tape (four wraps is plenty). Thread the drain valve in clockwise at the rear bottom until snug and level, then tighten with pliers. Thread the gauge in clockwise at the front and tighten by its rear hex nut only — never by the gauge face.
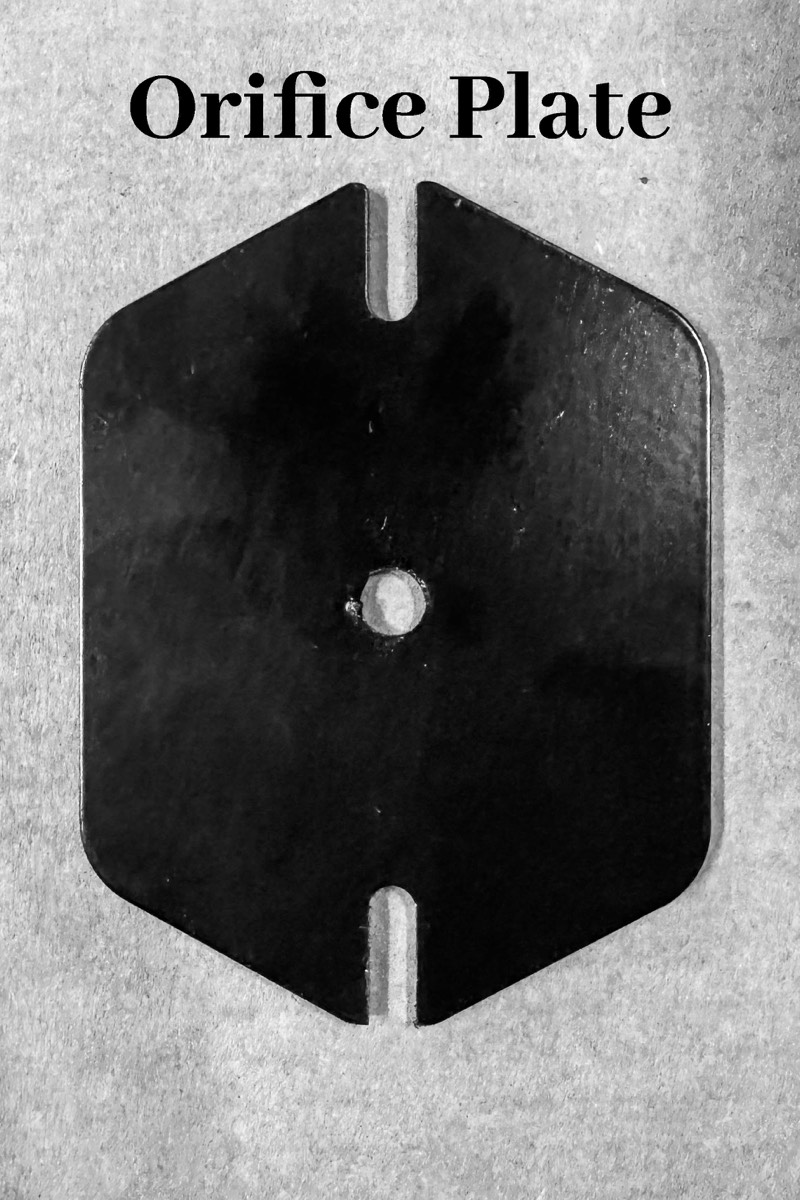
Step 8 · Orifice Plate — 2 screws, 2 nuts
Thread the brass orifice clockwise into the orifice plate. It only seats on one side, so if it resists, flip the plate. Then bolt the plate to the burner intake with two 1/4" screws and two 1/4" nuts.

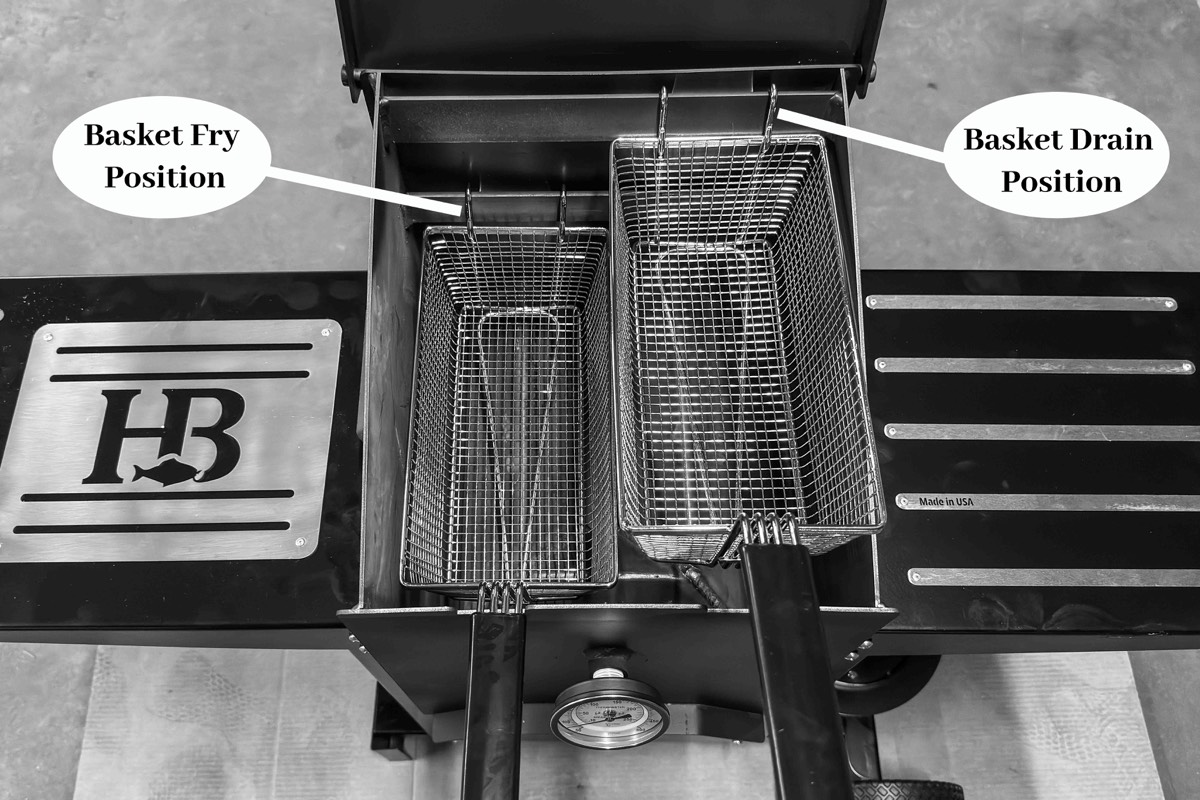
Step 9 · Oil & Baskets
Fill the pot with about 4 gallons of cooking oil — it should reach the midway point of the lower bar position. Place the baskets into the lower frying position. The two baskets sit in different spots: the right is the drain (rest) position, the left is the cooking position.
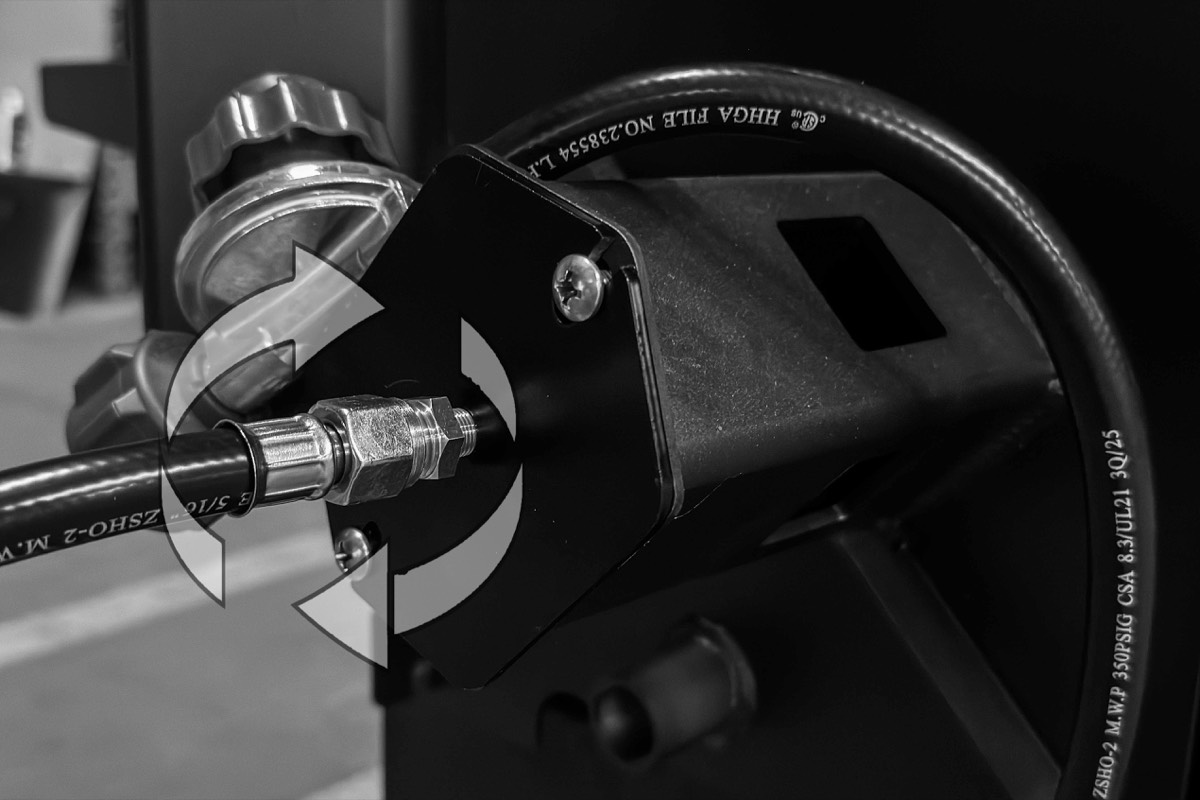
Step 10 · Propane & First Light
Seat the propane tank in the propane base and attach the regulator, running the hose cleanly to the burner with no kinks. Turn on the gas, light the burner, and make every day a fry-day.
Perform the gas leak test on page 13 every time the tank is connected. Only light the burner after the test runs clean.
Gas Leak Testing
The gas leak testing procedure must be performed every time the tank is connected to the cooker.
- Gas leak testing must be performed in a well-ventilated area.
- During the gas leak testing procedure, always keep the unit away from open flames, sparks, or lit cigarettes.
- Never use a flame to check for gas leaks.
- If the burner does not light within 5 seconds, turn the propane tank valve and regulator valve off immediately. Always wait at least 5 minutes for gas fumes to dissipate before repeating the procedure.
- Always use the propane tank valve and regulator valve to turn the unit "ON" and "OFF".
- Never use a unit that has a gas leak.
Step 1.
Make sure the propane tank valve and the regulator valve are turned OFF.
Step 2.
Make sure the connector nut is securely fastened to the propane bottle and the SAE fitting is tightened to the burner. Hand-tight only on the QCC-1 connector. Do not use a wrench.
Step 3.
Prepare a soapy water solution. One part dishwashing liquid to three parts water. Apply a generous amount of the soapy mixture to the regulator, the connection nut, the entire length of the hose, and the SAE fitting at the end of the burner assembly.
Step 4.
With the regulator valve in the OFF position, open the propane tank valve two full turns (counter-clockwise). Open the regulator valve fully and check for bubbles at the control valve, along the entire length of hose, and at the SAE fitting. Do not leave gas on for more than 10 seconds. If soapy mixture starts bubbling, gas is leaking. Turn the regulator valve to OFF, close the propane tank valve, and replace the leaking hose or fitting.
Never operate this propane burner with a leaking hose or connection. Never use a flame to check for gas leaks.
Repeat the procedure with soapy mixture until no bubbles appear. Turn the regulator valve OFF and close the propane tank valve after each test.
Step 5.
Once all gas leaks have been sealed, wait at least 5 minutes for gas fumes to dissipate before lighting the burner.
Operating Instructions
First-Time Use
Wash the fryer with dishwashing detergent and warm water prior to first use. The inside of the unit has been sprayed with cooking oil to prevent rust during shipping.
Light The Burner
- Confirm clearance. 10 feet overhead, 3 feet on every side. No combustibles within range.
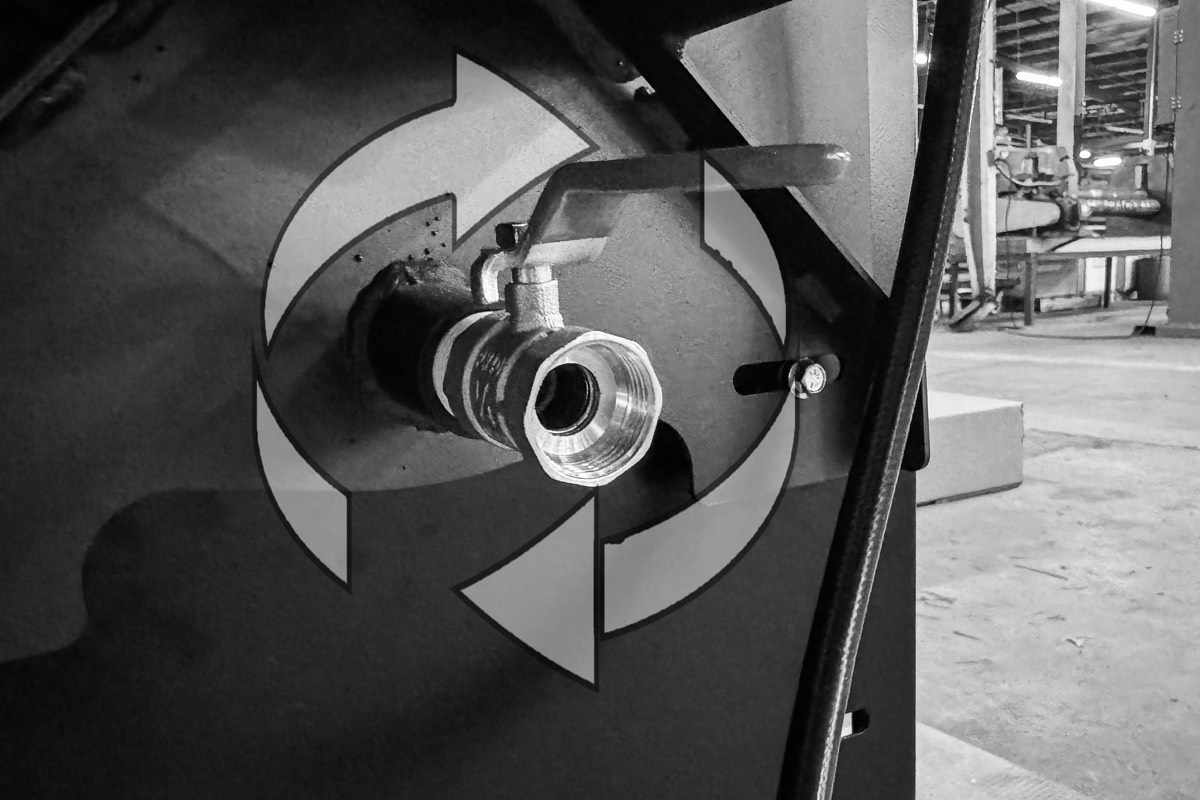
- Confirm the V-drain valve is fully closed (handle perpendicular to the spout).
- Confirm the regulator hose runs cleanly from the tank to the burner with no kinks.
- Fill the pot with cooking oil to about 3/4 up the basket. Approximately 4 gallons. Do not fill over the top of the basket. If in doubt, leave a little out — easier to add more than to take out.
- Seat the two frying baskets, one inside the pot and one on the basket hanger.
- Close the regulator valve. Open the valve on the propane tank slowly until fully open. Listen for hiss. Do not open and walk away.
- Always use caution when lighting the cooker. Crack open the regulator valve and ignite through the front burner port with a long-stem trigger lighter. Do not allow gas to build up. If the cooker does not ignite within 3 seconds, close the regulator valve and wait 1 minute before attempting to light the cooker again. Never place your body in front of or near the burner port.
- Open the regulator valve to increase temperature. The flame should be a clean blue cone with a small yellow tip. A roaring all-yellow flame means rich. A hissing white-blue flame means lean. Fine-tune with the regulator. The burner air openings are fixed by design and require no adjustment.
- Operate ONLY in a well-ventilated area.
- Bring oil to approximately 325 to 350°F and begin frying food. Heat-up from a 70°F cold start: 12 to 14 minutes.
Frying
- Pat food dry before lowering into the oil. Surface moisture causes splatter.
- Lower baskets slowly. Do not exceed half-basket loads per drop. Two half-loads cook better than one full load. Overcrowding drops oil temperature and causes greasy food.
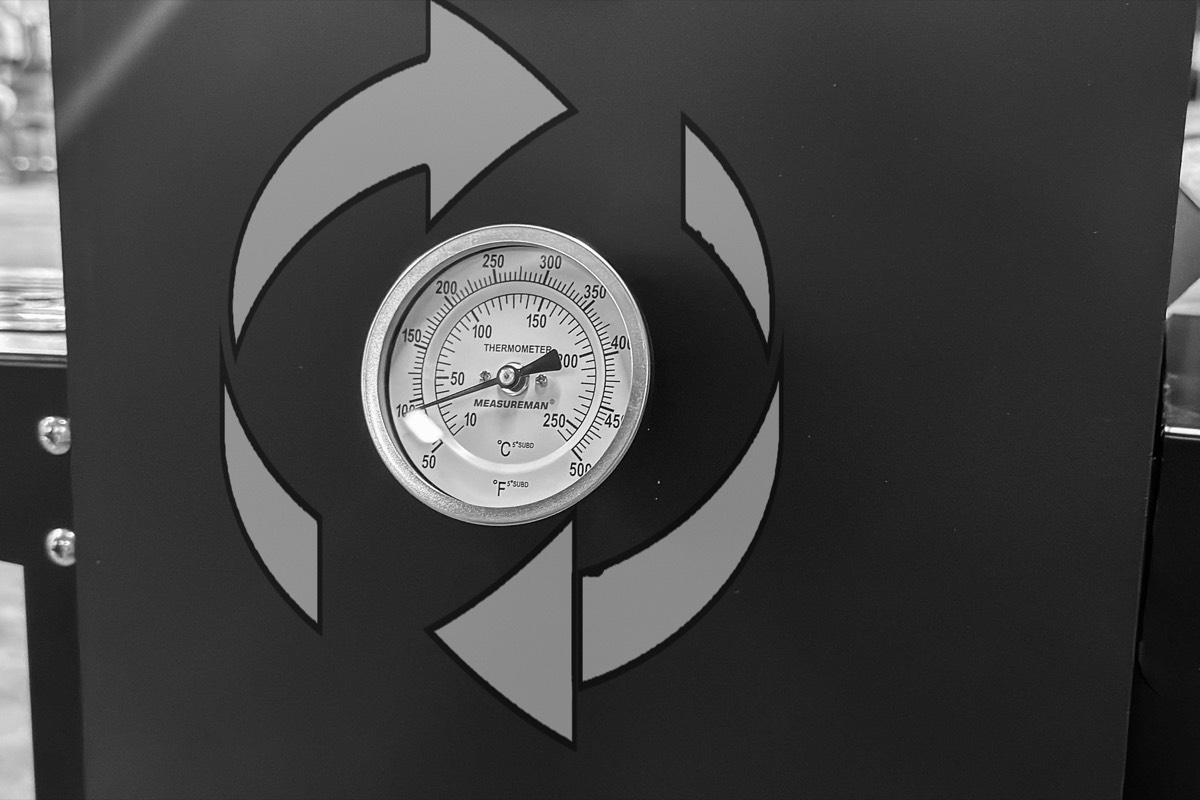
- Watch the thermometer the whole time. Oil temperature drops the moment cold food enters. Adjust the regulator up to recover.
- Pull baskets to the basket hanger when food is done. The forward angle drips oil back into the pot. Let the basket drip 20 to 30 seconds before transferring food.
- Skim breading and crumb buildup with a spider as needed. Debris in the oil burns black, smokes, and shortens oil life.
Shut-Down Sequence
- Lift baskets out of the oil and onto the basket hanger.
- Close the propane tank valve fully (turn clockwise). The flame at the burner will starve out within seconds as the line bleeds dry.
- Close the regulator valve after the flame is out.
- Leave the lid open while the oil cools. A closed lid traps moisture against the basket and hanger assembly.
- Do not move the cooker while hot. Wait until oil temperature is below 200°F.
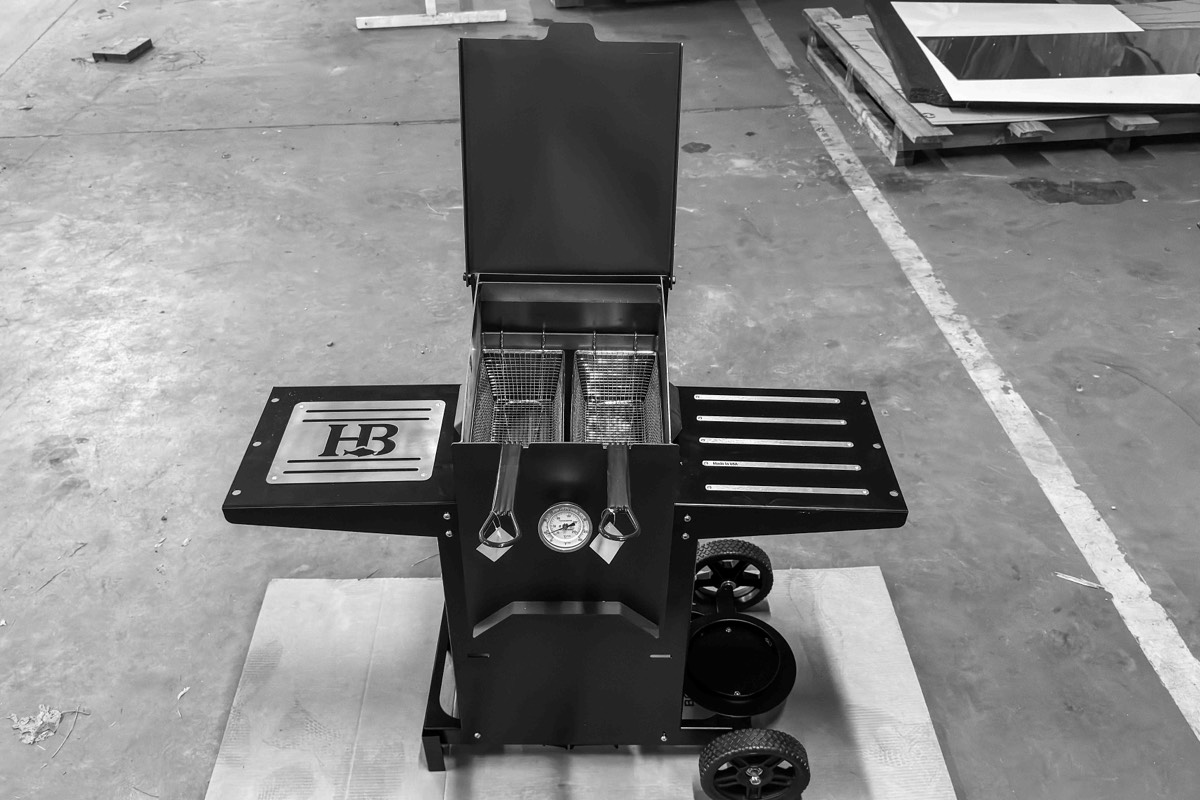
Tabletop Mode
The pot lifts off the chassis. Use this mode for table service, demonstrations, or any setting where the rolling chassis is impractical.
- Lift the pot only when fully cool and fully empty. Never lift a pot containing oil, hot or cold.
- Place the pot on a level, non-combustible surface. The same 10-foot overhead and 3-foot side clearances apply.
- Reattach the regulator hose to the burner before lighting. Repeat the gas leak test. Every relocation resets the test clock.
- Tabletop mode does not include the integrated propane shelf. Stage the tank on the ground next to the unit, upright, with at least 3 feet of clearance from the burner.
Storage Between Uses
- Store outdoors under a cover, or in a ventilated outbuilding. Never store the propane tank indoors, in any living space, or in any enclosed garage.
- Disconnect the regulator from the tank for storage of more than 30 days. Cap the tank.
- Store the pot empty and dry. Wipe the inside with a thin coat of food-safe oil if storing more than 30 days.
- Cover the unit with a breathable cover. Do not use plastic sheeting, which traps condensation against bare steel.
Proper Care and Maintenance
- Drain oil through the V-drain into a metal storage container. With the oil out, fill the pot with hot water and a degreaser, run a long-handle brush around the interior, drain through the V-drain again, then wipe the pot dry with a sponge or dry cloth. Spray the inside with a nonstick cooking spray to prevent rusting.
- We recommend changing the oil after 25 to 30 normal cookings and straining the oil every 5 cookings. Straining removes batter and meal that would otherwise carbonize and shorten oil life.
- Inspect the propane hose, regulator, and connections before every use. Replace any component that is cracked, swollen, or shows signs of melt damage. Replace the regulator and hose every 5 years regardless of apparent condition.
- Inspect the burner and venturi tube for spider webs, insect nests, or debris before the first cook of every season. A blocked venturi is the leading cause of yellow-flame and slow heat-up issues on outdoor LP cookers.
- NOTE: Current propane tanks are equipped with a safety valve (OPD valve) that restricts propane output if the hose is cut or burned. If this valve closes, you will only get a small yellow flame. To reset the OPD valve: close the tank valve, disconnect the regulator, close the regulator valve, reconnect the regulator hand-tight, then open the tank valve very slowly, approximately 1½ to 2 turns. Open the regulator valve and relight the "Hurricane Bay".
- Do not pressure-wash the burner, regulator, or hose connections. The standard Hurricane Bay has no electrical components. Water at the burner traps in the venturi and corrodes the jet over time.
- Do not use oven cleaner or harsh acid degreasers on the pot interior. They etch the steel and shorten useful life.
Burner Inspection
The Hurricane Bay burner is a fixed-air design. There is no air shutter to adjust. Field service is limited to inspection and cleaning.
- Disconnect the regulator hose from the propane tank.
- Remove the burner access panel from the rear of the chassis.
- Inspect the burner head for debris, carbon deposits, or insect nests. Brush the burner head and air openings clean with a stiff-bristle brush. Do not use lubricant or solvent.
- Inspect the venturi tube. Pass a pipe-cleaner or thin brush through the length of the tube to clear any obstruction.
- Reinstall the burner access panel before reconnecting propane.
Specifications
| Hurricane Bay HB-4 Fish Fryer | |
|---|---|
| Capacity | 4 gallons cooking oil |
| Pot & chassis material | 12-gauge American steel |
| Finish | High-temperature powder coat, charcoal black, 1200°F-rated |
| Burner | Single, 90,000 BTU/hr, fixed-air design |
| Fuel | 20 lb LP cylinder (not included) |
| Regulator | 20 PSI adjustable, Type 1 (QCC-1) connector |
| Hose length | 48 inches |
| Operating pressure | 0.5 to 20 PSI (regulator-controlled) |
| Heat-up time, cold to 350°F | 12 to 14 minutes from 70°F ambient |
| Recovery time after a load | 2 to 4 minutes after a half-basket drop |
| Servings per hour | 25 to 30 |
| Frying baskets | Two stainless mesh, fixed handle |
| Thermometer | Front-mounted dial, °F + °C |
| Drain | True V-drain to single low-point spout, hand-valve |
| Wheels | Two, sealed bearings, rear-axle mount |
| Propane tank shelf | Integrated to chassis, bungee retention |
| Footprint (assembled) | 41" W × 24" D × 39" H |
| Pot dimensions (alone) | 14" W × 22" D × 22.5" H |
| Weight | 63 lb pot · 40 lb stand · 103 lb assembled |
| Shipping carton 1 (pot + burner) | 22" W × 17" D × 24.5" H |
| Shipping carton 2 (chassis pack) | 24.5" W × 20.25" D × 6.75" H |
| Stacked shipping unit | 24.5" W × 20.25" D × 31.25" H (2 cartons) |
| Shipping weight | ~117 lb |
| UPC / GS1 | See unit nameplate |
| Country of origin | United States, Jacksonville, Arkansas |
| Compliance | Designed and built to ANSI Z21.89 / CSA 1.18 outdoor cooking specialty gas appliances |
Specifications subject to change as the product line evolves. The actual specifications of your unit are stamped on the nameplate attached to the chassis.
Frequently Asked Questions
About The "Hurricane Bay"
Limited Warranty
What This Warranty Covers
General Terms
This Hurricane Bay Limited Warranty gives you, the customer, express limited warranty rights from Hurricane Bay, the manufacturer. In addition, you may also have other legal rights under applicable local law or special written agreement with Hurricane Bay.
This warranty remains in force for one year on components and accessories and for lifetime on structural materials and workmanship, to the original purchaser, from the date of purchase.
What This Warranty Does Not Cover
Hurricane Bay does not warrant that operation of this product will be uninterrupted or error-free. Hurricane Bay is not responsible for damage that occurs as a result of your failure to follow the instructions intended for the Hurricane Bay product.
This Limited Warranty does not apply to expendable or consumable parts and does not extend to any product from which the Hurricane Bay identification nameplate has been removed or that has been damaged or rendered defective (a) as a result of accident, misuse, abuse, contamination, improper or inadequate maintenance, or other external causes; (b) by operation outside the usage parameters stated in the user documentation that shipped with the product; (c) by improper site preparation or maintenance; (d) from loss or damage in transit; or (e) by modification or service by anyone other than a Hurricane Bay authorized service provider.
Owner Responsibilities
Setup and operate the appliance according to directions. Take reasonable care to prevent rust or oxidation. Operate at appropriate temperatures. Store the product properly between uses. Failure caused by a third-party component is not covered by warranty.
Filing a Claim
- Locate the nameplate on the chassis. Record the model number and serial number.
- Take photos of the issue from at least three angles.
- E-mail info@hurricanebayfishfryer.com with photos, serial number, date of purchase, a description of the issue, and the original receipt.
- Hurricane Bay will respond within 5 business days with a determination and next steps.
How State Laws Relate To This Warranty
The implied warranties of merchantability and fitness for a particular purpose are limited in duration as set out above. Liability for indirect, incidental, or consequential damages is excluded. Some states do not allow such limitations, so the above limitations may not apply to you. This warranty gives you specific legal rights, and you may have other rights which vary from state to state.
Exclusive Remedy
To the extent allowed by applicable local laws, these terms and conditions constitute the complete and exclusive warranty agreement between you and Hurricane Bay. These terms supersede any prior agreements or representations made in connection with your purchase. No change to the conditions of this Limited Warranty is valid unless made in writing and signed by an authorized representative of Hurricane Bay.
Limitation of Liability
Hurricane Bay's maximum liability under this Limited Warranty is expressly limited to the lesser of the price paid for the product or the cost of repair or replacement of any component or structural materials that malfunction or fail in conditions of normal use.
Limited Warranty Period
The Limited Warranty Period commences on the date of purchase. The date on your sales receipt is the date of purchase unless Hurricane Bay or your reseller informs you otherwise in writing.
What We Will Do To Correct Problems
- Self-repair. Remote diagnosis and remote repair. Hurricane Bay ships any necessary part. The customer installs the part and returns unused or defective parts. All parts and shipping paid by Hurricane Bay.
- Parts-only service. Replacement parts at no charge for defects within warranty coverage.
- Unit replacement. If a covered defect cannot be fixed by self-repair, the customer ships the unit to Hurricane Bay at their expense; Hurricane Bay ships the repaired or replacement unit back at our expense.
- After warranty expiration, spare parts remain available for as many as five years after the product is discontinued.
Jacksonville, Arkansas, USA
info@hurricanebayfishfryer.com
hurricanebayfishfryer.com
Built by Cody Johnston · Bryan Glaze · Scotty Howard